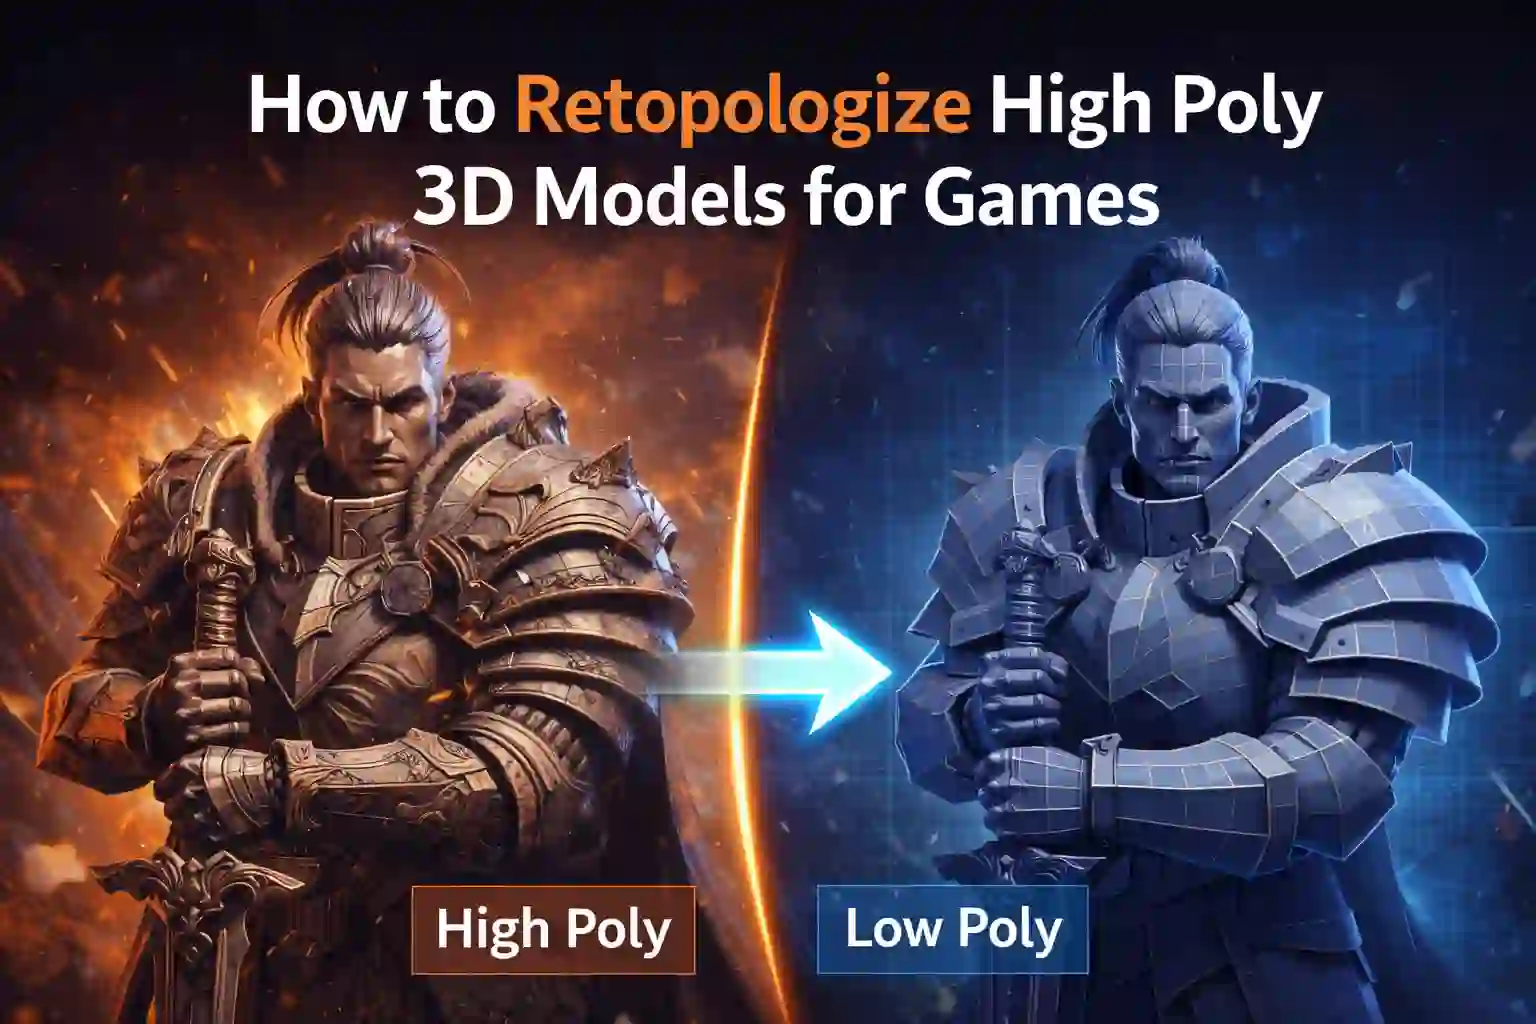

How to Retopologize High Poly 3D Models for Games
by Animatics Asset Store in Blog on January 20, 2026You finally finish sculpting that detailed character or weapon. Every edge looks perfect. Every surface feels alive. Then you drop it into your game engine. Frame rate tanks. Performance breaks.Your excitement fades fast. That moment hits almost every 3D artist working with high poly 3D models. Sculpting feels free. Game optimization feels brutal. Retopology sits right in the middle.
In this guide, I will walk you through how to retopologize high poly 3D models for games without killing your creativity or your sanity. You will learn practical steps, common mistakes, and workflow tricks that actually work in production.
What Retopology Really Means for High Poly 3D Models
Retopology means rebuilding geometry with purpose.
Not less detail.
Smarter detail.
High poly 3D models often reach millions of polygons. Game engines cannot handle that load in real time. According to Unity documentation, most real time characters stay between 10,000 and 100,000 polygons depending on platform.
Retopology creates a clean, low poly mesh that follows the shape of your sculpt. You then bake details from the high poly into textures.
The goal stays simple.
Smooth deformation
Clean edge flow
Efficient polygon use
You keep the visual quality. You lose the performance cost.
When To Retopologize?
Not every asset needs the same approach. Timing matters.
Retopology Makes Sense When:
• Asset animates or deforms
• Model appears close to the camera
• The asset repeats many times in a scene
• You target consoles or mobile devices
Static background props sometimes skip heavy retopology. Characters, weapons, and vehicles never should.
High poly 3D models look great in renders. Games demand discipline.
Planning Before You Touch a Single Polygon
Study the Silhouette First
Before drawing topology, step back.
Zoom out.
Squint.
The silhouette sells the model more than surface detail. Focus topology where the shape changes. Ignore flat areas. This mindset saves thousands of wasted polygons.
Decide the Target Poly Count Early
Never retopologize without a budget.
Ask simple questions.
Is this for mobile
Or Is this for PC
Or Is this for next gen
A hero character on PC might allow 80,000 triangles. A mobile enemy might allow 8,000. That decision controls everything that follows.
Identify Deformation Zones
Joints need clean loops.
Elbows. Knees. Shoulders. Neck.
High poly 3D models hide deformation issues. Low poly meshes expose them fast. Plan edge flow before you start clicking.
Manual vs Automatic Retopology Tools
Automatic Tools Save Time, Not Quality
ZRemesher and similar tools help block out topology fast. They work best for:
• Static props
• Concept meshes
• Early prototypes
They struggle with animation ready edge flow.
Manual Retopology Wins for Games
Manual work takes longer. It also wins every time for characters and weapons.
Tools artists rely on include:
• Maya Quad Draw
• Blender Shrinkwrap workflow
• TopoGun
You gain control. You decide where polygons live. That control matters for high poly 3D models used in real time games.
The Clean Retopology Workflow That Actually Works
Here is a workflow I have seen succeed across studios.
Step 1: Block Primary Loops
Start with big shapes.
Face loops.
Joint loops.
Major hard edges.
Ignore tiny details.
You will bake those later.
Step 2: Even Out Polygon Density
Avoid long stretched polygons.
Avoid dense clusters next to empty zones.
Even density helps baking and animation. Game engines love consistency.
Step 3: Keep Quads Where Possible
Quads deform better.
Triangles belong at the end, not during layout.
High poly 3D models tempt artists to overcomplicate topology. Keep it boring. Boring works.
Step 4: Test Deformation Early
Rig quickly.
Pose the mesh.
Break it early.
Fixing topology before baking saves hours later.
Baking Details:
This step brings your sculpt back to life.
You bake normal maps, ambient occlusion, and sometimes curvature maps from the high poly to the low poly mesh.
Key tips that prevent headaches:
• Match smoothing groups
• Use proper cage meshes
• Avoid intersecting geometry
• Name meshes consistently
According to Marmoset Toolbag documentation, most baking artifacts come from bad low poly preparation, not bad sculpting.
Retopology sets up everything that follows.
The Bridge: Learning Faster by Studying Good Assets
Sometimes the fastest way to improve is not starting from zero.
When I get stuck or need a reference, I look at production ready assets. Stores like Animatics Asset Store help because you can inspect clean topology, proper UVs, and optimized meshes built for real games.
Not to copy blindly but to understand decisions. Seeing how others retopologize high poly 3D models shortens your learning curve more than any tutorial.
Common Retopology Mistakes You Should Avoid
Even experienced artists fall into these traps.
• Over detailing the low poly
• Ignoring animation needs
• Baking before testing deformation
• Wasting polygons on flat surfaces
• Forgetting LODs
High poly 3D models can distract you with detail. Games reward restraint.
Retopology Mindset That Separates Pros from Beginners
Great game artists think backward.
They imagine the final frame rate.
imagine animation stress.
and platform limits.
Then they build toward that goal.
Retopology is not cleanup. It is design.
Once you embrace that idea, your workflow changes fast.
Your Next Step Forward
If you sculpt high poly 3D models for games, retopology will never disappear from your workflow. It will either frustrate you or empower you.
Start slower.
Plan more.
Test earlier.
Study real production assets. Break your own meshes on purpose. Learn where they fail.
That approach turns retopology from a chore into a skill that sets your work apart.
Latest Blog